GNOME Disks
→ → →
Manipulate partitions, check disk status and more with GNOME Disks
If you install second disk you will have to create one or more partitions on it in order to be able to utilize it. You can do this using GNOME Disks tool.
GNOME Disks layout
The most important part is identify your disk. All storage units will be listed on the left sidebar. The disk used as the example is marked with red line (look at the image). Check the model of the disk (blue line), its size (orange line) and ensure it is already empty (does not contain any data, yellow line):
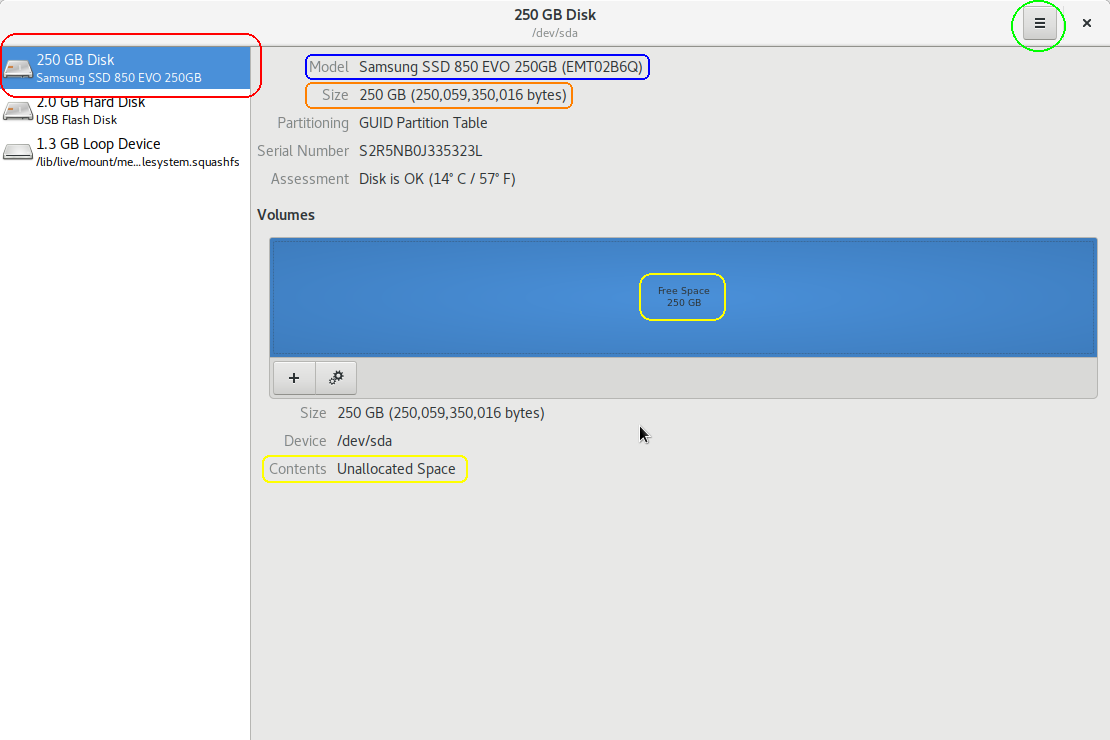
Light green circle is the app's menu button.
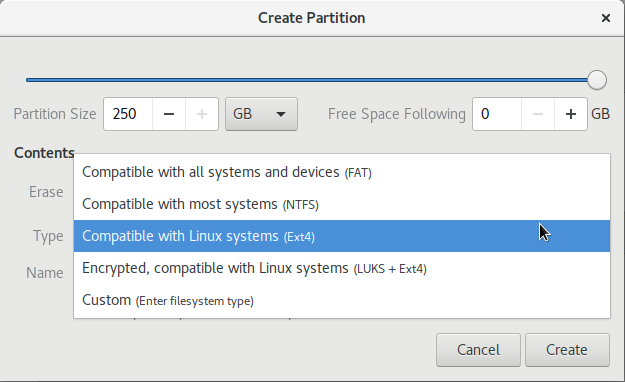
Create partition
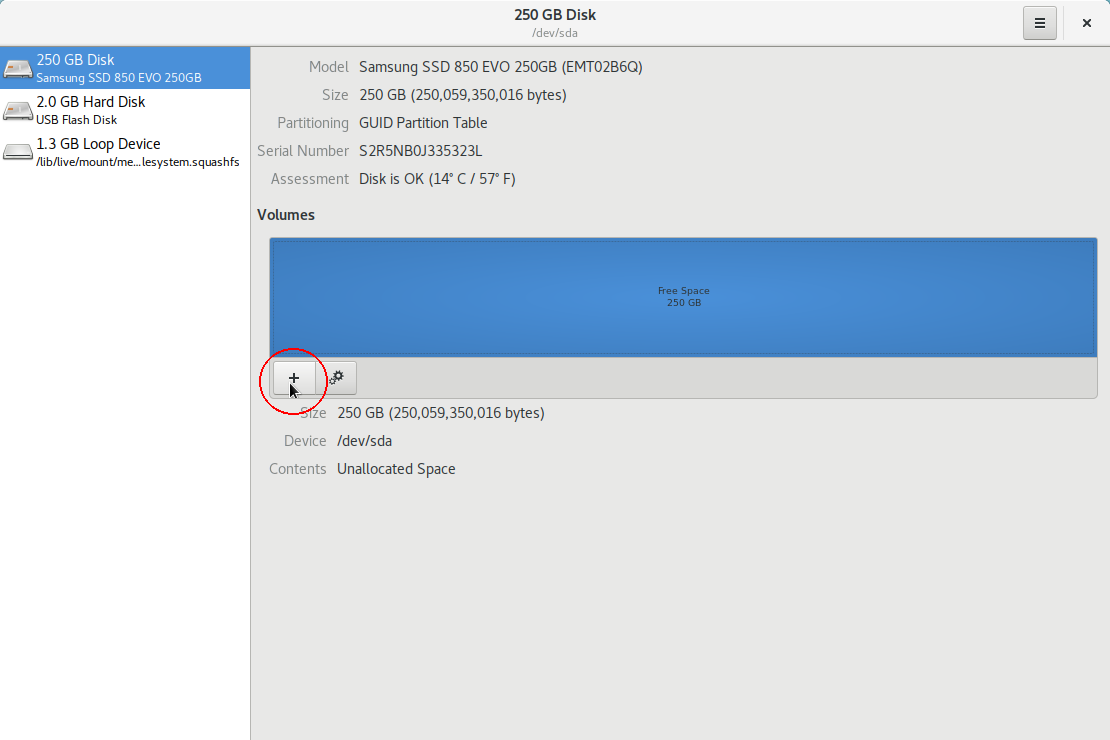
Create partition by clicking the disk's empty space and clicking the + button:
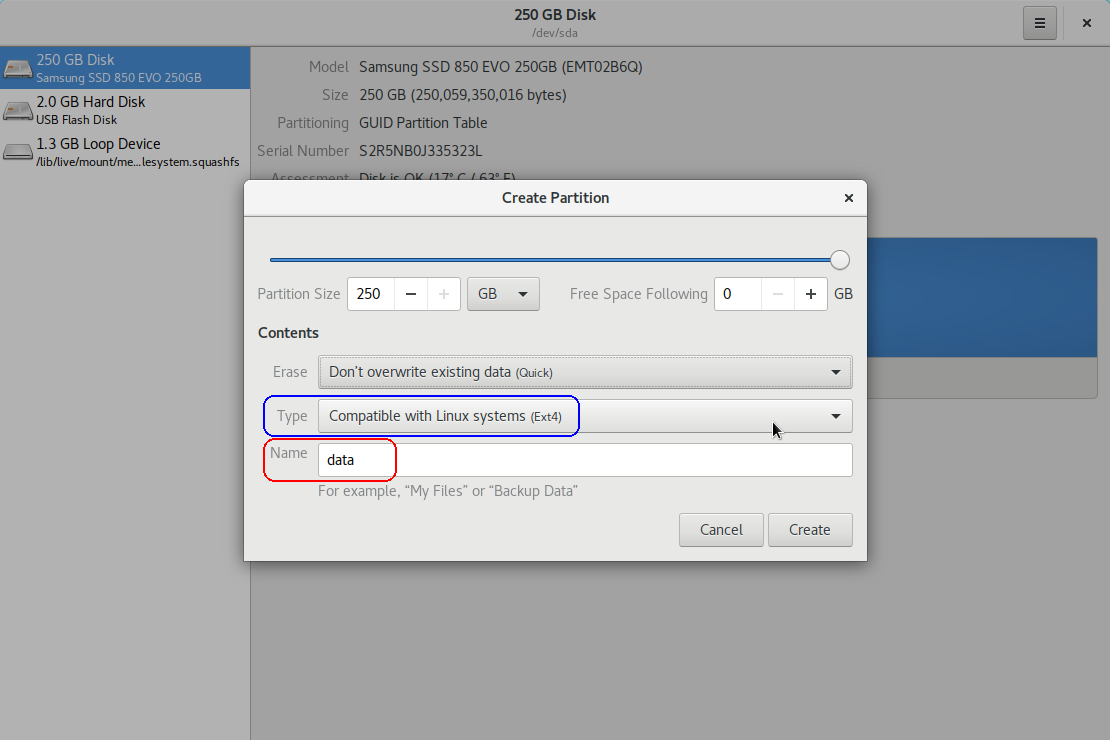
Specify the size of the partition, select the file system and assign some name to it. In this example, we will use this disk for data storage, hence the name data:
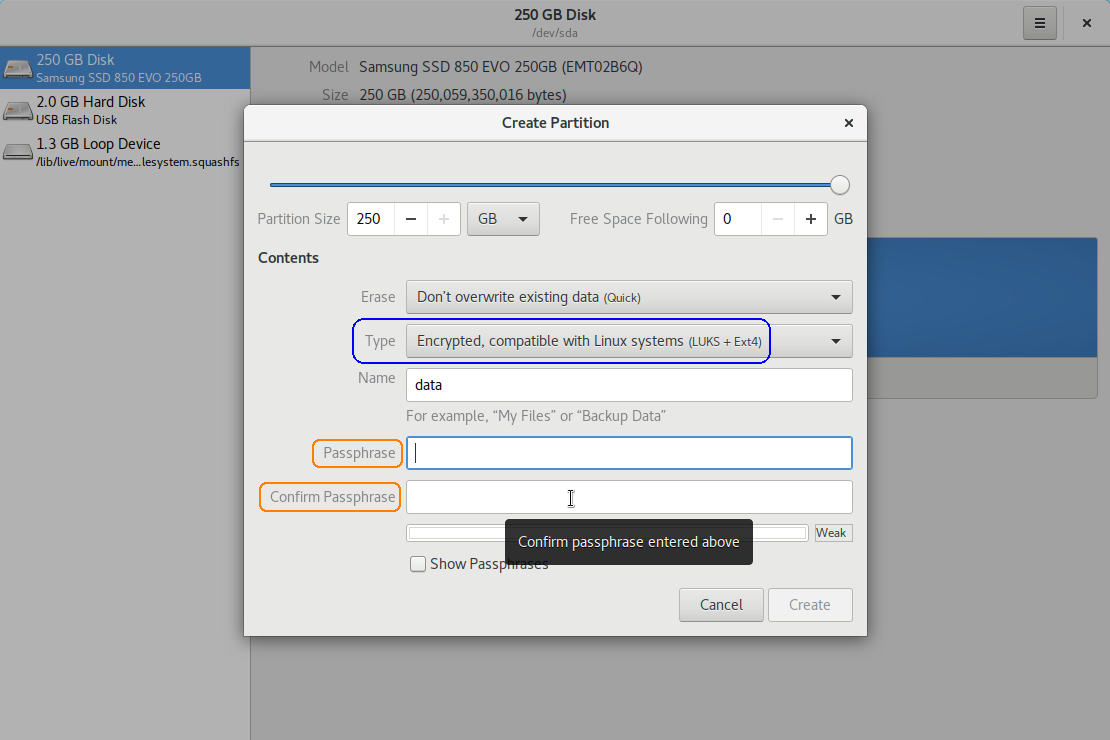
If you want to encrypt the partition, select the appropriate partition type and specify the password:
You can also select other partition filesystems, but this should be done if you are experienced user and you know what you are doing:
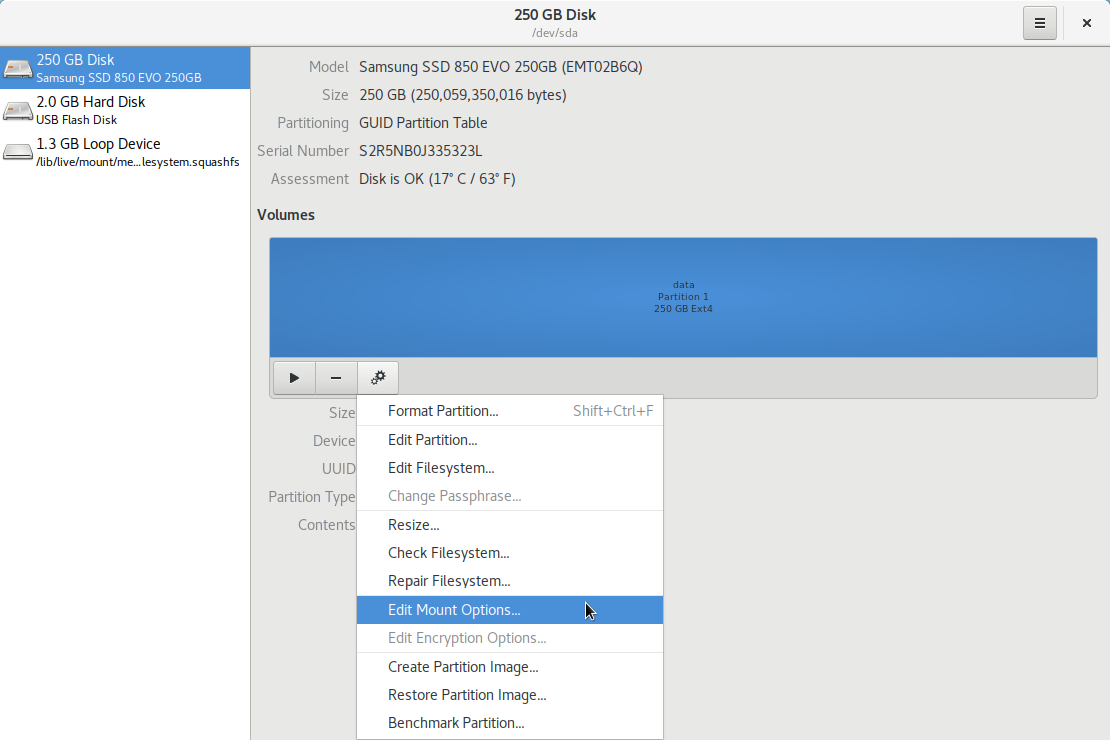
Partition options
Once you create a partition you can set up some options for it. Click the options button:

To populate the menu. Menu options are mostly self-explanatory. The most important for you will be how and where to mount your partition:
You can safely leave User Session Defaults on, if you care for more control turn this off and edit options. For example, you can specify Mount Point, for example: /mnt/mydata. This directory must exist before you try to mount the partition.

Remove partition
You can remove a partition by simply selecting it and clicking the remove button:

- Last Author
- mladen
- Last Edited
- Jan 12 2018, 15:52